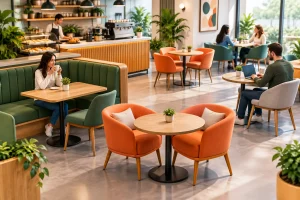
A bar can look perfectly proportioned on a floor plan and still fail during a busy service. The usual causes are stools set too close together, an aisle that disappears once guests are seated, or insufficient working room behind the counter. Knowing how to plan bar spacing means designing for the movement of people, not just the footprint of furniture. For restaurants, cafés, hotel lounges, and high-volume venues, that distinction protects comfort, service speed, and revenue.
Start With the Bar’s Operating Role
Before measuring a stool, define what the bar needs to do. A coffee counter with short guest stays can accept a more compact arrangement than a cocktail bar where customers settle in for a full evening. A restaurant bar may need room for food runners, servers collecting drinks, POS stations, glass storage, and guests waiting to be seated. Each use changes the spacing decision.
The number of seats should be the result of the operating plan, not the starting point. Adding one more stool may appear commercially attractive, but a crowded bar often reduces the quality of service and makes higher-spend guests less likely to stay. In premium hospitality settings, a slightly lower seat count with better personal space can produce a stronger overall result.
Also consider who will use the bar. A neighborhood café may see laptop users and quick solo visits. A hotel lounge may serve couples, groups, luggage-carrying guests, and an international clientele with different expectations of personal space. The layout should support the venue’s actual behavior, not an idealized render.
How to Plan Bar Spacing at the Counter
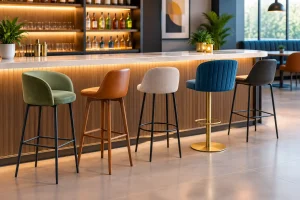
The first measurement is the width allocated to each guest along the bar. For most commercial projects, allow 24 to 30 inches per stool, measured center to center. Twenty-four inches is a practical minimum for compact counter seating with backless stools or narrow-profile bar chairs. Twenty-six to 28 inches is more comfortable for regular dining use. Thirty inches or more suits upholstered bar chairs, armrests, elevated food service, or concepts positioned around a more relaxed experience.
This is not simply a rule about elbow room. Guests need space to turn, enter the seat, place a bag, and move without repeatedly negotiating with the person beside them. Wide, upholstered stools naturally require more room than slim metal designs. If the chair has arms, a generous curved back, or a swivel base, calculate from its full operating width rather than the seat width shown in a product specification.
The counter overhang matters as well. A typical bar top should provide roughly 10 to 12 inches of knee clearance from the counter edge to the supporting structure below. Without adequate overhang, guests sit too far from the surface or turn sideways to avoid the base. That discomfort can make even well-spaced stools feel poorly planned.
Bar height and chair height must work as a pair. A standard 42-inch bar generally calls for a 29- to 31-inch seat height. A 36-inch counter usually needs a 24- to 26-inch counter stool. Aim for approximately 10 to 12 inches between the top of the seat and the counter surface. Small errors here are immediately felt by guests and can undermine a carefully selected seating collection.
Measure the Stool in Use, Not at Rest
Furniture plans often rely on the nominal width of a chair. For bar seating, that can be misleading. A guest does not sit still in the exact outline of a stool. They pull the chair out, rotate their body, lean back, cross their legs, and place belongings nearby.
Request full product dimensions, including the outside width, depth, arm projection, and swivel movement where applicable. For custom production, it is useful to review a sample or layout drawing before approving the final quantity. This is especially valuable when coordinating upholstered seating with a fixed stone, wood, or metal bar that cannot easily be altered later.
Protect the Aisle Behind Seated Guests
The space behind bar seating is where many layouts become difficult in real service. Start with the depth of the stool, then add the pull-back and circulation zone. When a guest is seated, their body and chair typically extend 30 to 36 inches from the bar edge. This dimension may increase with deep-back bar chairs or larger guests.
For a secondary path where occasional staff or guests pass behind seated customers, plan a clear aisle of at least 36 inches beyond the occupied seating zone. For an active service route, 42 to 48 inches is a more dependable target. In high-traffic restaurants, 48 inches or more allows servers carrying trays to pass without asking guests to move their chairs.
The right dimension depends on traffic direction. A one-way, low-volume route can be tighter than a main path linking the kitchen, dining room, restrooms, and entrance. If two staff members must regularly pass each other, or if the aisle doubles as an accessible route, do not design to the minimum. Operational tolerance is worth more than fitting an additional seat into a drawing.
Avoid placing a bar directly against a major circulation route unless the room has enough depth to separate seated guests from passing traffic. Constant contact behind a guest’s chair feels disruptive and raises the risk of spills. A bar should invite people to stay, not make them feel like they are sitting in a corridor.
Give the Service Side Enough Working Depth
Guest-side spacing is only half of the plan. Behind the bar, bartenders need a clear, logical workspace with room to reach refrigeration, glasswashers, ice wells, undercounter storage, and backbar shelving. For a single bartender in a compact operation, 36 to 42 inches of clear working aisle can be workable. For two bartenders working at the same time, aim for 48 inches or more, depending on equipment doors, drawer extensions, and the intensity of service.
Equipment should be included at its open position, not its closed position. A refrigerator door, dishwasher, pull-out waste unit, or ice bin lid can block circulation at the exact moment the bar is busiest. Map the opening arcs and identify where staff cross paths. This is one of the most effective ways to prevent a beautiful bar from becoming slow and frustrating to operate.
Where the backbar includes display shelving, liquor storage, or an espresso station, allow room for safe reaching and replenishment. If staff must turn sideways around a colleague every time they restock glassware, the layout is undersized. Good bar planning supports a consistent rhythm: take an order, prepare the drink, deliver it, reset the station, and repeat without unnecessary steps.
Coordinate Bar Spacing With the Rest of the Floor Plan
A bar rarely works in isolation. Its seating affects nearby dining tables, host stands, door swings, restrooms, and waiting areas. Guests at the bar should not block table service, and people queuing for a drink should not form across a main entrance or emergency path.
Consider sightlines too. Bar chairs with high backs can create an attractive visual boundary, but they may block views into the venue or make a compact room feel heavier. Lower-back stools keep a space more open, while upholstered, higher-back models offer greater comfort and a more residential feel. The correct choice depends on the concept, the duration of stay, and the visual hierarchy of the interior.
For outdoor bars, plan additional clearance for weather, uneven surfaces, and guests carrying bags or jackets. Materials also matter. Outdoor bar chairs should be selected for commercial durability, cleanability, and stable placement on the finished surface. The spacing may be right on paper, but a chair that catches on pavers or shifts on decking creates a poor guest experience.
Use Layout Testing Before Final Production
The most reliable bar layouts are tested before furniture is ordered in volume. Mark the bar and circulation zones on site with tape, cardboard templates, or sample chairs. Ask staff to walk the route with trays, open equipment doors, and simulate a busy service. Have someone sit at every planned stool position, especially at corners and near walls.
This process often reveals issues that drawings do not show: a column limits chair pull-back, a pendant hangs too low over an end seat, or a service path becomes narrow when guests stand to leave. It also allows the project team to balance seat count against comfort with evidence rather than assumption.
For custom hospitality furniture, share the bar dimensions, counter height, layout plan, finish palette, and expected use at the beginning of the specification process. A manufacturer can then recommend suitable bar chair proportions, frame materials, upholstery options, and quantities that fit the project rather than forcing a standard product into an unsuitable space.
Plan for Comfort That Supports Commercial Performance
The strongest bar layouts make guests feel they have room to relax while allowing staff to work with speed and confidence. They do not chase maximum stool count at the expense of circulation, nor do they oversize every aisle without regard for the room’s commercial goals. The answer depends on the bar concept, furniture profile, service intensity, and local building and accessibility requirements, which should always be verified with the appropriate project professionals.
At Rezze Design, we approach bar seating as part of a complete hospitality environment: proportioned to the counter, coordinated with circulation, and built for repeated commercial use. When spacing and furniture are developed together, the bar becomes more than an attractive feature. It becomes a place guests choose to occupy and teams can operate efficiently every day.